Wednesday 24 August 2011

Egg Tarts in Muffin Tray


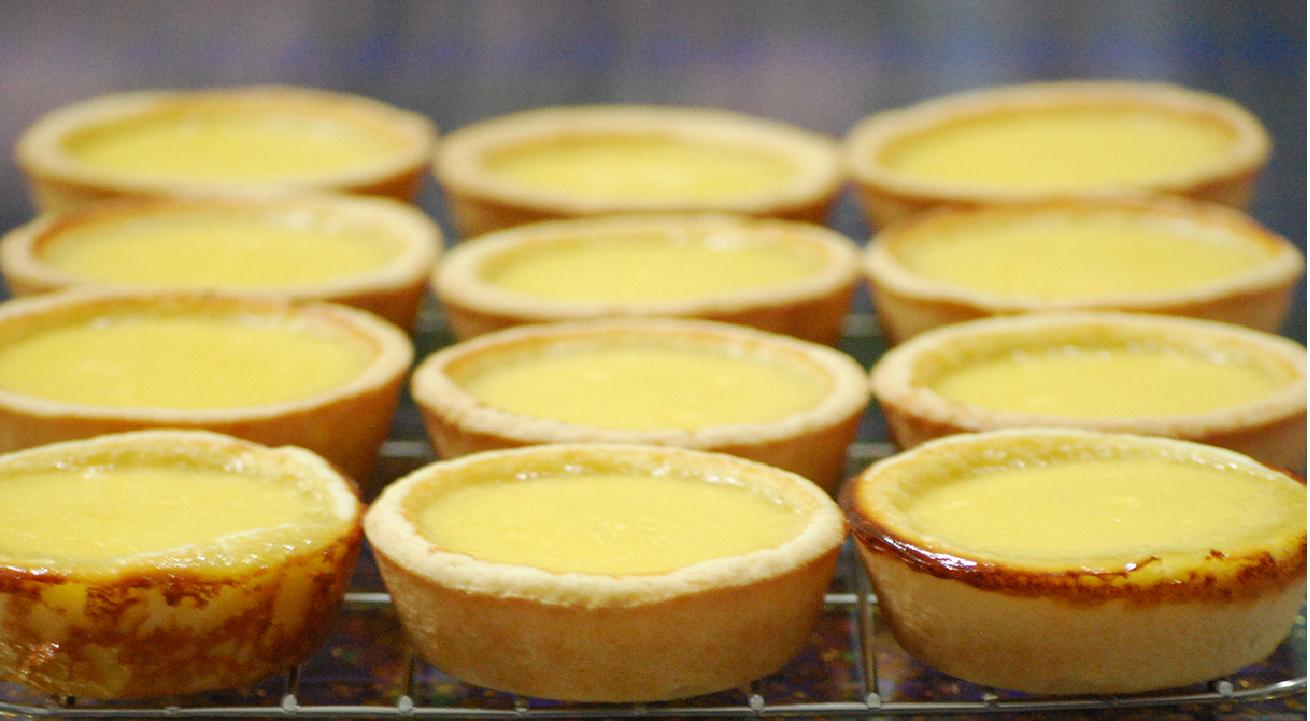
Not the typical wavy edge you see in egg tarts ...

This came as a surprise, to nobody else but me. 
Me ?? – Making egg tarts??
Egg tart is on my ‘No Eat” list, but that’s not important, is it?  My opinion and preference are irrelevant here. 

So, that was the plan; to make egg tarts over the weekends.  I spent days searching for the molds.  I mean not that it’s difficult to find, just that it’s difficult to find MY kind of molds.

So what is MY kind of molds?
No plastics.
No silicon.
No tin.
No (Teflon) non-stick.
Preferably not aluminum.
Can do with stainless steel.
Definitely a yes for cast iron.
Definitely a yes for Pyrex glass.
Definitely a yes for stoneware, ceramic and alike.

Ok, I can consider upgrading Teflon non-stick to ‘preferably not’.
But still, sounds like mission impossible right?

I was at Orchard Road.  You might think: Egg tart molds? - Of all places but Orchard Road??  Along side with Louis Vuitton and Prada??  Ha, I can only say desperate situation calls for desperate measure.  So, I was in Takashimaya and I saw THE bread loaf tray.  I could literately feel my eyes brightened up.  So I asked the sales assistant for the price. 
“SGD 278.” She said.
“You must be kidding!!” I broke out so fast so naturally, impossible to swallow my words before it was too late.
She walked away discreetly, in half a minute.  I am not sure if she felt insulted by my exclamation, but I surely was.  “You are such a cheapo!!” I mocked at myself.  And you think that was embarrassing enough, ha ha ... There was this much more expensive Dutch oven; a couple bought it right in front of my eyes!!!

Then I was at Tangs, found something worth going into my potential to-have list – stainless steel bread loaf pan.  It’s kind of small, biggest is about 200g or so. Can do la, buy two lor … But I was still thinking of that killer cast iron pan at Takashimaya … I should have taken a picture and post it here...

So, I came home empty handed.  The egg tarts recipe was screaming at me.
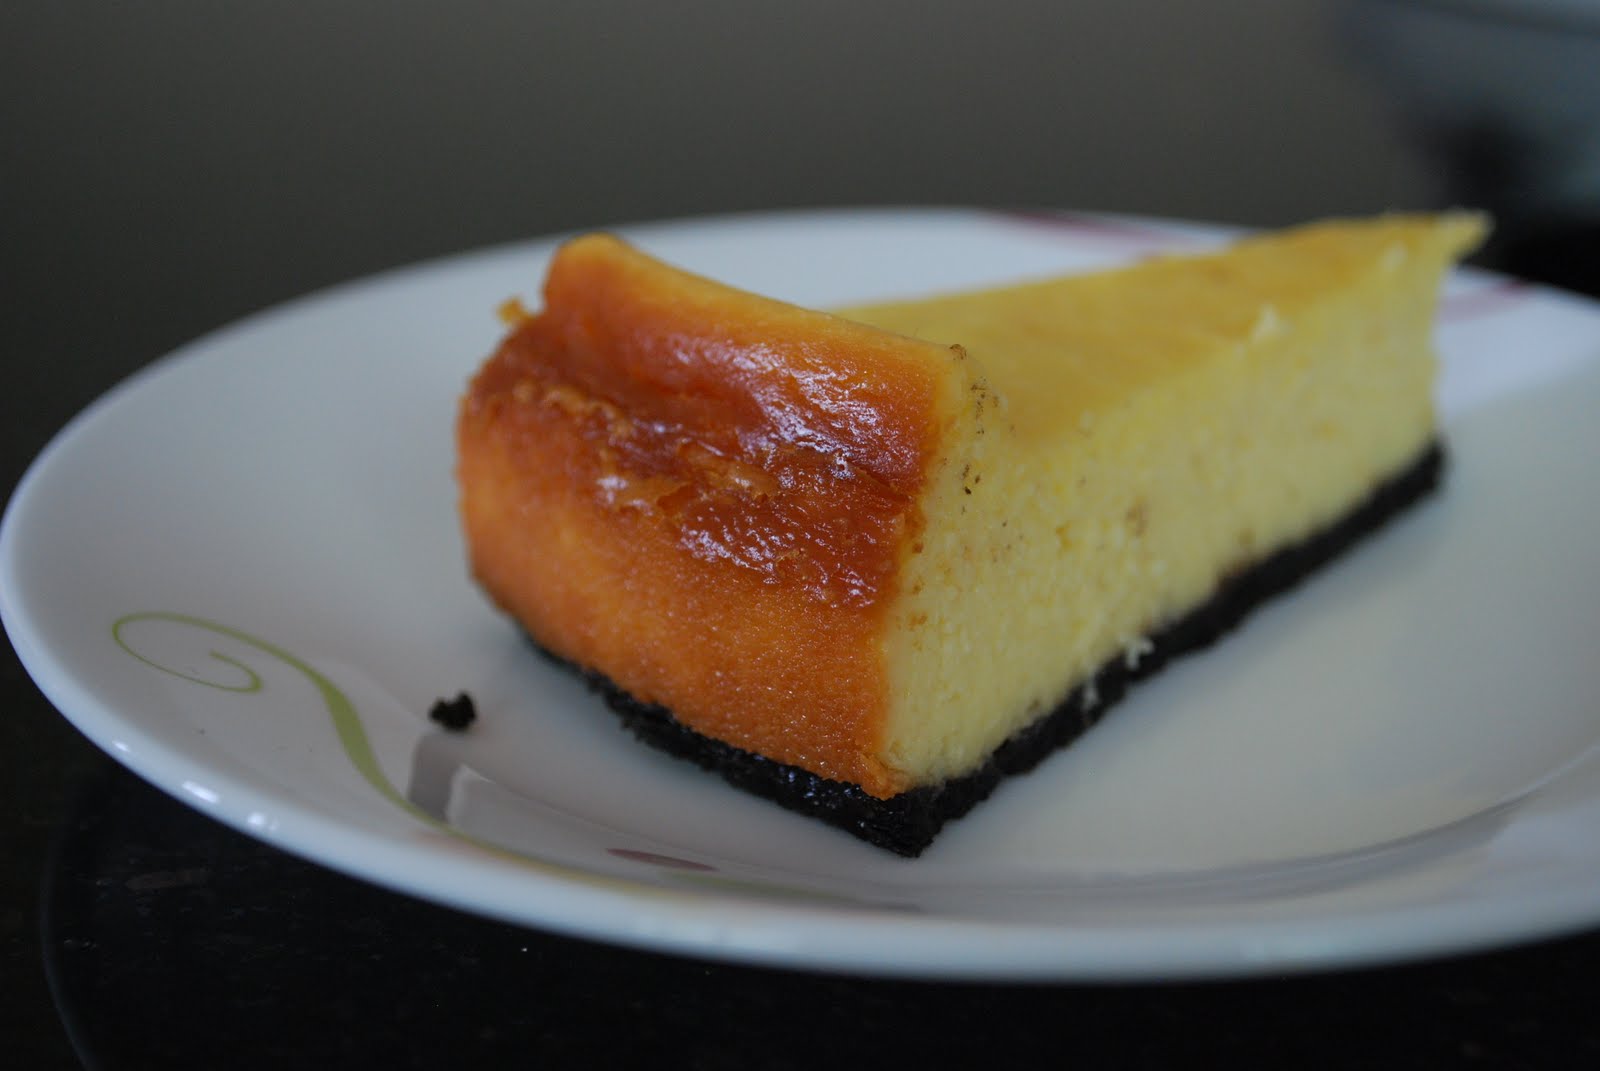
In the end, I baked my egg tarts in a 12-cup muffin tray.  This was not too much a make-do, really.  The ultimate I came across, was a blogger baking cheese cake without springform pan!!!! If you are reading this, please identify yourself … ha ha.  Can you imagine pressing the base in a round tray? – I think that’s still not so bad, but removing the cheese cake from the tray?? – Simply courageous.


I got my recipe from Christine.  As usual, I made some changes.  First, I replaced with small amount of potato flour for a lighter crust.  Then, I cut down the sugar amount in the custard, and it was still too sweet.
So here is my version:

Ingredients:
Crust:
175g plain flour
50g potato flour
125g butter
55g icing sugar
1 egg, whisked
a dash of vanilla extract

Custard:
3 eggs
100g caster sugar (can be reduced further)
225g hot water
85g evaporated milk
1/2 tsp vanilla extract


I used up only half the custard for 12 tarts, yet the tarts turned out proportionate; crust is not noticeably thick, custard filled up to the rim; two even overflew.  So why ???
Then my husband stepped in to solve the problem: “creme brulee sounds good!” So, I baked the remaining in little bowls.  Conclusion: custard is good for egg tart, but too firm as creme brulee.


How do the egg tarts taste? - Crust is good. Custard filling is good. That, are according to my darlings.  My daughter had one for breakfast, and took one to school.  So I guess they are nice.  If you asked me; I think they taste terrible.  I had a little bite involuntarily.  But hey, don’t take my words for it.  Egg tart is on my ‘No Eat’ list; in case you have forgotten.

It's a recipe much easier than I expected. 
My better half said: “You took five minute to prepare the dough but thirty to shape it.”
And I replied: “And one minute for you to chew it down.”
I have complete trust in his taste; I think my daughter got that from him.  So I have two food critics at home.

Oh, in case you are wondering about the selection criterion of my kitchen ware.  There is only one – healthy choice.  My mother-in-law said to me: “I have been using those all my life, why are you so picky?”  Er … what am I supposed to say? – Because I don’t use the same towel to dry my clean bowl and wipe the dinning table?? ... !!

Tuesday 16 August 2011

Thin Crust Pizza


I am so very happy with this recipe; it's simple, easy, and practically knead-less.  Most importantly, I don’t have to deal with the left over thick pizza edge in my kids’ plates.

If you are up for it, you can  make you own pizza sauce.  I use fresh tomatoes; usually make a bigger portion and freeze the remaining.
Depending on your preference, you can vary the  amount of seasoning to your liking.
More garlic? More herbs? More onion? More sugar? More salt? More pepper?
By all means … play with them … and have fun.

For greater ease, here is a semi-scratch method.  Pour in a can of ready made spaghatti sauce, add in the right amount of  ingredients and simmer till thicken.  There you got it. 


Pizza sauce
Ingredients:
5 large tomatoes
1 tablespoon of garlic (minced)
1 onion (minced)
50 ml water
Half teaspoon of Italian herbs
Pinch of black pepper
Pinch of Salt
2 tablespoons olive oil
Sugar (optional)

Directions:
  1. Bring pot of water to boil. Drop in tomatoes and cook for 1 min. Remove from pot.  Peel and remove seeds.  Cut into small dice.
  2. Heat olive oil in pot and sauté onion and garlic till golden brown.
  3. Add in tomatoes and water.
  4. Simmer  for about 30 -45 mins till thickened and season to taste.

I got the pizza dough recipe from here.  I am so not used to the ‘envelope of yeast’ or ‘package of yeast’ measurement. 
Envelope and package, same? No same?
Packing size in all countries, same? No same?
Since I bought my yeast by one big package, I must know the equivelence right...?? So, one envelope/package of yeast is about 7g or 2 ¼ teaspoons. 

Talking about yeast, where do you store yours?  My good friend came home from a one-month trip, and realised (the hard way) the bottle of yeast has gone to a better place; the poor dough simply did not rise!  I keep mine in the freezer.  See, it's always good to be friendly and chat with whoever in the store.


This one is an easy recipe , but the hours of waiting time can be quite constraining.  So, I usually make the dough the night before and keep in the fridge; prepare the dough, have dinner, scream at the kids, watch some TV, .... and pizzas fresh from the oven for lunch tomorrow, scream at the kids some more. I have stored my dough for 2 days in the fridge or freeze the dough for weeks.  I suggest to bake them closer to the lower rack, to get a more crusty base and also to avoid surface burnt.

Er ... I hasn't been completely honest - even though this recipe is easy and simple, I do have problem shaping the dough. Maybe I haven't relax the dough enough, cos' I am always so eager to move on ... The easiest way for me, is to  flatten the dough with rolling pin a few times and then slowly push out with fingers till I got the desired thinness.  I have to do this on the baking tray cos' the dough sticks onto the work surface.  If I shaped the dough on the kitchen top, by the time I 'un-stick' the dough, it will spring back and I have to do this all over again ... That's the reason why I have not gotten a pizza peel and baking stone!!  It is such ...a double jeopardy - no good reason to shop for a good obsession (baking)! But, ha ha, since when an obsession can be good ???   Then again, perhaps a good motivation to be patient; wait for the dough to relax the next time ??? - Tough la ... I know myself ...


Friday 12 August 2011

CC Cheese Cake


After my experience with bread, even more so with my still on-going quest for chewy chocolate chips cookies, cheese cake is my confidence booster.

A friend gave me the recipe.  The first time I baked it, I followed it all diligently; even when that meant having some left over cream; too much to trash and too little for anything else.  Frustrating isn’t it?? So it sat in the fridge for many, many days and finally ended up in the trash bag. *URGHHH*

I think it’s in my gene (ya right, what an excuse …), having left over ingredients just drives me nuts!  So I looked around and concluded that a little difference in the cream cheese and thickened cream ratio is not going to kill the recipe. I don’t know the original source of the recipe; obviously it has been passed around from one generous baker to another, then to another.  Thank you all for sharing your precious recipes and experiences in your food blogs.  We food bloggers are bunch of nice people you know …. **blush blush**

Here is my modified version. 

Ingredients:
Base
15 pcs of Digestive Biscuits (crushed)
80g melted butter
Or,
20 pcs of Oreo cookies (crushed,40 pcs after cream removed)
45g melted butter

Filling
2x 250g of Kraft Philadelphia cream cheese
150g caster sugar
1 ½ tablespoon of corn flour
2 eggs, lightly beaten
275ml Thickened cream (I use Bula)

Optional:
 Juice and zest of lemon
Or
Zest of 1 orange

Directions:
1.      Combine biscuits crumbs and melted butter.  Press into a spring form cake pan lined with aluminum foil. Chill in fridge for half an hour.
2.      Beat cream cheese and sugar till smooth.  Add corn flour, eggs, thicken cream and beat till combine.
3.      Add lemon juice and zest or orange zest.
4.      Pour mixture into prepared cake pan and bake for 40 – 45 mins at 180C. 
5.      Cool in oven till near to room temperature and chill in fridge overnight.

You will find that the cream cheese and cream portion is in full packing size. If you are using different brands, potentially different packing size,  er ...  go with the gut feeling;  a little more or less is fine.

My kids love Oreo cookies base, which means the Digestive biscuits are now sitting in the can doing nothing … *URGHHH*


If you like thicker base, by all means increase the base portion.  I have also tried mixing Oreo cookies with Digestive biscuits in an attempt to finish up the latter.  My daughter commented: “Mummy, the Oreo base taste different today and it is not as sweet.” She is 11 years old, and refused to be fooled.

The challenge for me is the aesthetic look of the cheese cake.  My cheese cakes had this rim around it; like Crater Lake. Sometimes better sometimes not, depending on how I played with the oven conditions. Sad to say, I have not found the right conditions … yet. But hey, even Starbucks cheese cake looks the same! Happened to the pro even, so I am not that in a hurry.


My good friend, Jen, bake hers in water bath to avoid crater formation.  I am not sure how well that works, but I won’t do it.  Once, and only once, I had my bread dough in the oven with hot water during proofing.  The steam went in between the glass panels of the door; leaving running water marks, drove me nuts!  Worst, that area is not accessible for cleaning … still an eyesore! *URGHHH*

This is the first time I had such an even rise in the oven.  I think that's because I covered the top since the very beginning.  Then I had to uncover it cos' there was no sign of drying after 30 mins.


Rim or no rim, they all taste good.  Friends have asked for the recipe and happily baking away ...

Monday 8 August 2011

Cream Cheese Bread

My first attempt in bread making was … what 10 years ago?! I bought a box of ready mix.  All I knew about bread making was written on the box. Not surprisingly, it wasn’t successful.  The bread was sour and dense; I think the dough collapsed because I proofed it for too long. Ha ha, how would I know … I thought the longer the merrier.

From then, it has been just a thought that come and gone every now and then.  No time, no energy, no mood … I needed sleep more than anything else after my two little darlings have arrived.

Last year, a friend posted her bread on Facebook.   I said to her: ‘teach me.’  From there, is what people would have said: ‘… and the rest is history!’  

I have to admit, I am not an obedient baker; I would twist and change the recipe even with my limited experience.  That explains why I failed so often …

A good reason why I make bread is so that my loved ones eat healthily.  I bought this organic unbleached bread flour. My bread did not turn out good.  In fact, the dough was already not looking good; I couldn't get to the usual elastic dough.  I tried again, same thing happened.

So I googled, I mean who else knows better than Uncle Google right?  Then I realized that particular unbleached bread flour contained only 10.8% protein.  That is the typical protein level for all purpose flour of many other brands.  Bread flour ideally should have 12 – 14% protein.  I felt cheated.

So, I bought Gold Medal Better for Bread flour.  For heaven sake, what kind of mistake can you make right?? - Wrong! The poor me kneaded the poor dough for 30 mins on my mixer and hand kneaded further, still not able to stretch to thin film.  I am still wondering why … Maybe it’s not meant for Asian bread … I don’t know.

Have you ever heard of this book that promises five minutes a day, and you will have freshly bake artisan bread for breakfast?? I am not sure about you, but I was surely tempted and bought in! Why wouldn’t I? – Considering I usually take about 4 hours to product a loaf.  There is a soft sandwich loaf recipe way at the back of the book. If you are looking for soft bread, don’t, I repeat don’t even think about trying it.  How can one produce soft, fluffy bread without kneading?  My loaf turned out crumby and dense.

That got me thinking … everything is all about relativity.  Isn’t it?? Yes, it is soft compare to crusty Italian bread.  No, it is not soft compare to water roux bread.  So, I am back to my usual (bleached) bread flour and concentrate on my kneading skill. Gosh, must try some Japanese bread flour ...

I made this cream cheese loaf on a Wednesday, after I got home from work.  I was dying; my hands must knead some dough.  The bread was soft, even after days.  So if you are one of those who do not like the water roux smell in the bread, this one might work for you.  My darlings could not detect the cream cheese, so I think it can be a good base for sweet or savory bread. 


It was past 10pm by the time the bread was sent into the oven; kids were already in bed. My son woke up and asked for the bread cos’ ‘it smells so good and I am hungry.’

I sacrificed a little dough and filled it with spicy dried prawn for my husband. 


Cream cheese spread with sugar for breakfast ...


I got the recipe from here. The dough is quite wet.  I know is messy, but don’t let it stop you ya … I found this Japanese video in Utube, and it’s quite effective with wet dough.  I kind of enjoy the process now … from wet dough to a shiny elastic dough – very therapeutic!

I also bought this, a dish drainer to proof my dough ... works like magic ... Might sound like a joke, but hear me out ya ...It's a 3-piece set. Hot water goes into the base, dough in the drainer and cover. There you got an ideal environment, warm and humid, to proof your bread; rain or shine.